How to Create a Kanban Board in Notion
Creating a Kanban Board in Notion is couldn’t be easier, but before we dive into the how, we should first touch on the why. Here’s everything you need to know about Kanban Boards, including how to create a Kanban Board in Notion.
What is a Kanban Board?
Introduced by a Japanese industrial engineer, a Kanban Board is a straightforward product management tool that aims to limit work-in-progress, and thus maximize efficiency, by making all of the core tasks visible at a glance.
They represent a way of breaking down a large task into bite-sized chunks that help you blast through it. You can manage these tasks, assigning reasonable deadlines to each, to keep you on task and make you more productive.
Traditionally, they consist of three columns: To-Do, Doing, and Done. The former, a dumping ground for all planned tasks; the middlemost, a running log what you’re working on; and the latter, a cache of everything you’ve completed.
How to Create a Kanban Board in Notion
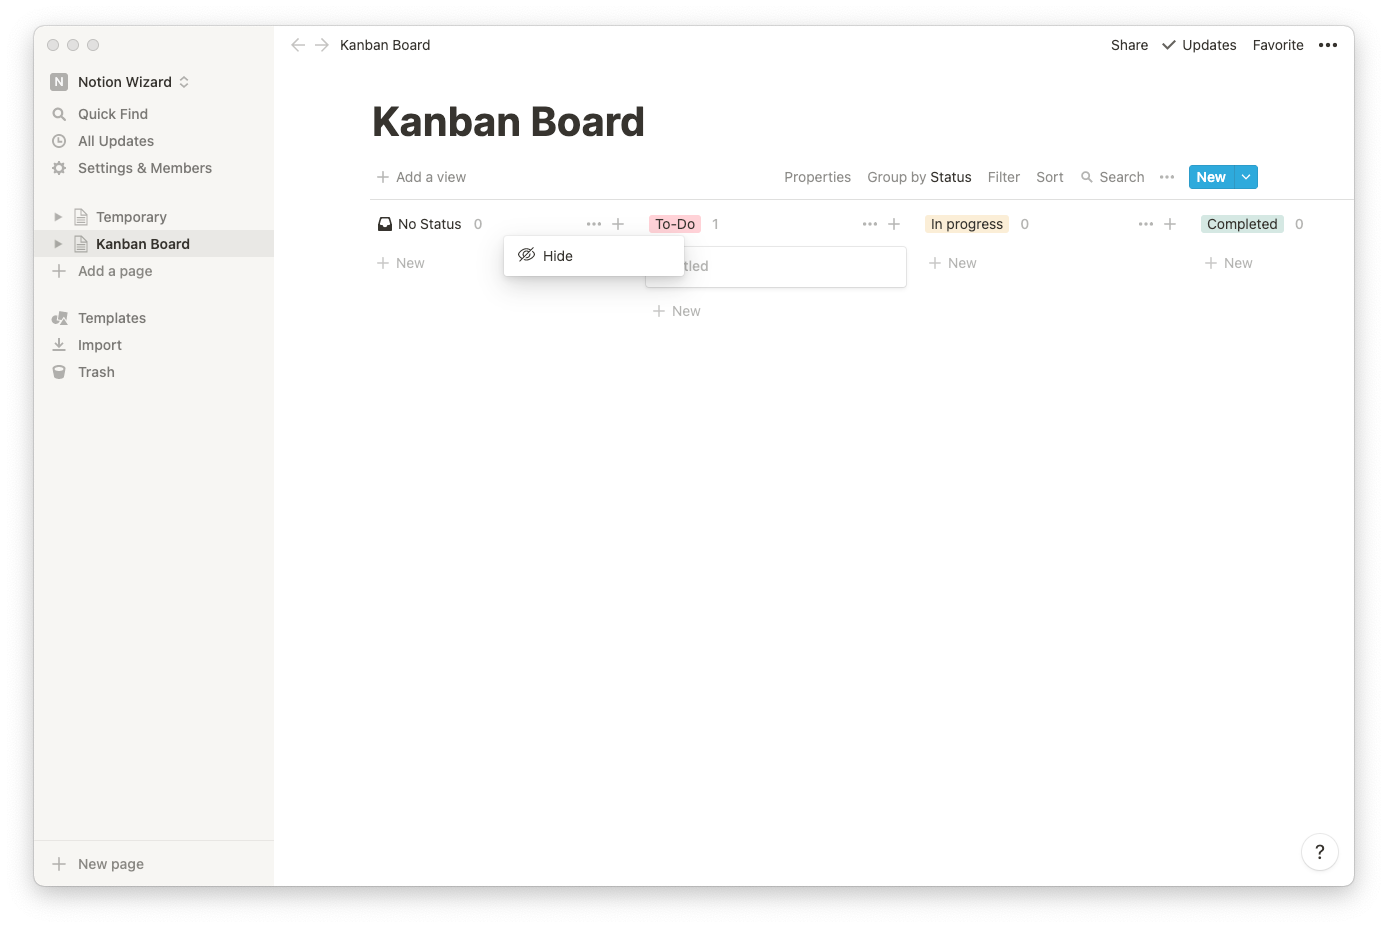
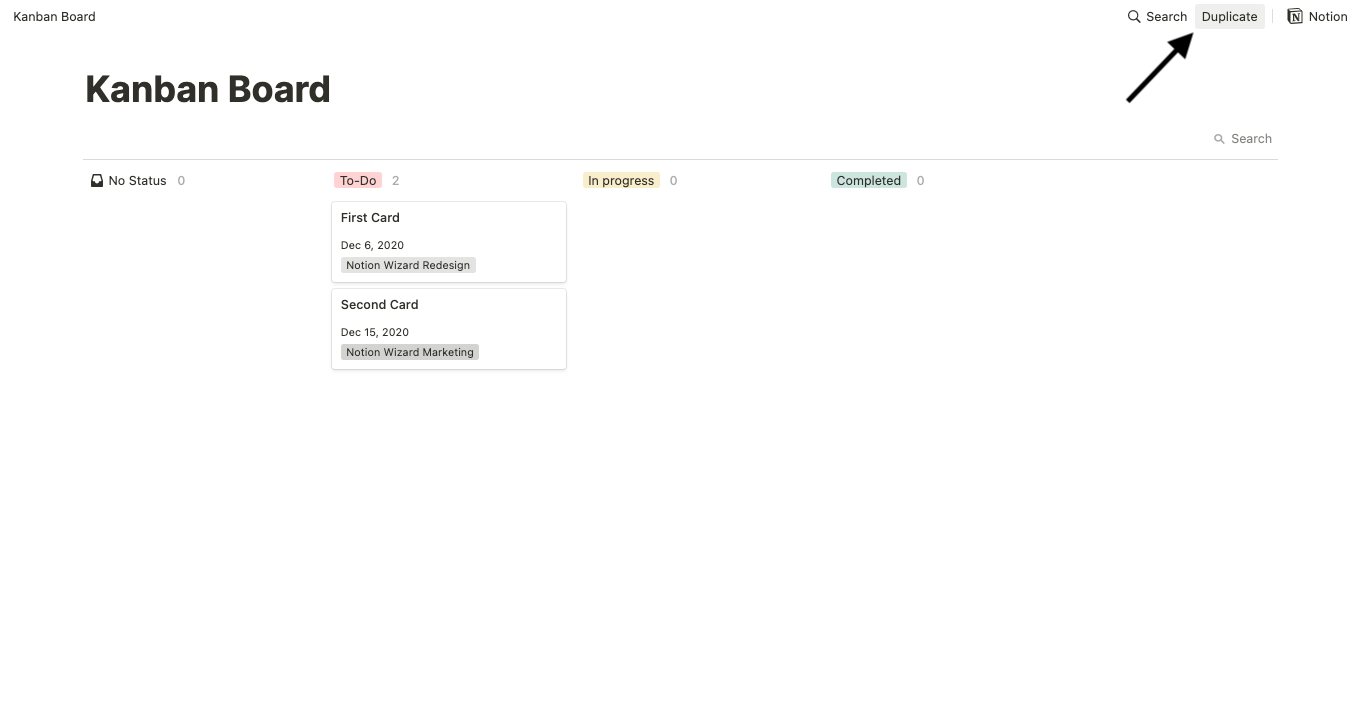
As we said earlier, creating a Kanban Board in Notion is easy. Just select ‘Add a Page‘ from the sidebar, choose ‘Board‘ from the Database menu, then rename the first column to ‘To-Do‘. That’s really all there is to it. Seriously.
Now, let’s address the elephant in the room: The ‘No Status’ column. While this could be useful for some, most people will inevitably want to remove it – and you can do just that by clicking the three horizontal dots and selecting ‘Hide‘.
If you were looking to create a traditional Kanban Board in Notion, mission accomplished. There is something you can do to modernize the workflow, though: Assigning additional properties to each card.
This is really as broad as it sounds. You can choose to add anything from a checkbox to a file to each card. For the purposes of streamlining workflow and increasing accountability, we recommend: ‘Deadline’ and ‘Project’.
Adding these is easy. Just open a card on your Kanban Board, then select ‘Add a Property‘. Next, assign the property a name, then select the property type. You’ll want ‘Date’ for ‘Deadline’ and ‘Multi-Select‘ for ‘Project’.
Adding a dedicated ‘Project’ option is that it’ll allow you to manage multiple projects from one Kanban Board, eliminating the age-old issue of having too many resources stored in too many different locations to be efficient.
The final step is to instruct Notion to display this new information on the Kanban Board itself, instead of reserving it for the card – simply select ‘Properties‘ from the navigation bar, then slide the relevant toggles to ‘ON‘.
You can filter by Projects within the Kanban Board and even have it default to just showing one if you only need to focus on one element for now, but since they’re all stored in one place, you have a high-level view should you need it.
We also recommend setting the Kanban Board to sort by deadline by default. To do this, select ‘Sort‘ from the navigation bar on your Kanban Board, followed by ‘Add a Sort‘. Next, change the property to ‘Deadline‘, then click on the page.

The beauty of a Kanban Board is it is as unique as the person that made it. If you’re after a barebones experience, you can achieve that, and if you’re in need of something more complex with multiple properties, you can do that too.
Should You Create a Kanban Board in Notion?
If it makes sense for your workflow, absolutely. Remember: The aim of a Kanban Board is to maximize efficiency. Give one a try. If it doesn’t work or feel natural, or it’s slowing you down, try something else. There’s no harm in experimenting.
Stuck? Use our Kanban Board Template
Can’t seem to make it work? You’re in luck – we’ve created a Kanban Board template for Notion you can install in your own Workspace in a flash. Now all you need to do is make the relevant changes to tailor the experience to you.
Just remember this is a template. While you have the option to follow it blindly, you also have the choice to modify it by tweaking the workflow, adding different views and filters, and even slimming it down further.