How to Create a Time Blocking Template in Notion

Creating a to-do list is all well and good, but you actually need to find the time to do the tasks. That’s where time blocking comes in: Break your day into chunks, and then pencil in things to do in those windows. These can be fifteen-minute, half-hour, hour-long, or even five-minute intervals — it all depends on what works best for you.
Here, we’ll walk you through how to create your own time blocking template in Notion, which you can then use each week to ensure you cross off all of the items on your to-do list, and share some useful pointers to make sure you’re on the right track. We’ve also created a basic Notion time blocking template to get you started.
How to Create a Time Blocking Template in Notion
Before we start creating anything, you’re going to want to do is think about how you want to break up your day. Personally, mine is broken into half-hour chunks, but most people prefer to break it up hourly. Others, including Elon Musk, like to manage their time in five-minute intervals, and some developers prefer two-hour cubes.
Once you’ve figured that out, open up Notion and create a new Page, selecting Table from the list of presets. In the first column, list all of the windows you came up with, and change the column name to Blocks. Done? Create seven new columns, and rename each to correspond to a day of the week, organized from Monday to Sunday.
Here’s where things get really interesting. Now we’re going to link the time-blocking template to your to-do list so you can automatically pull in items from the list and drop them into a time block. If you’d rather skip this step, you can start adding items into your time blocking template to start working on, and be on your way.
The main benefit of creating this relationship, outside of not having to type all of your tasks out again in a different location, is that you can easily jump to the original version on the to-do list and access and notes, files and comments associated with it, breaking down silos and creating a more efficient workflow.
We’re going to be using Notion’s relational database feature to do form this connection, starting by changing the property type of the Monday column. To do this, click on the column heading, hover over Text in the Property Type section, then scroll down and select Relation, and search for and select your to-do list.
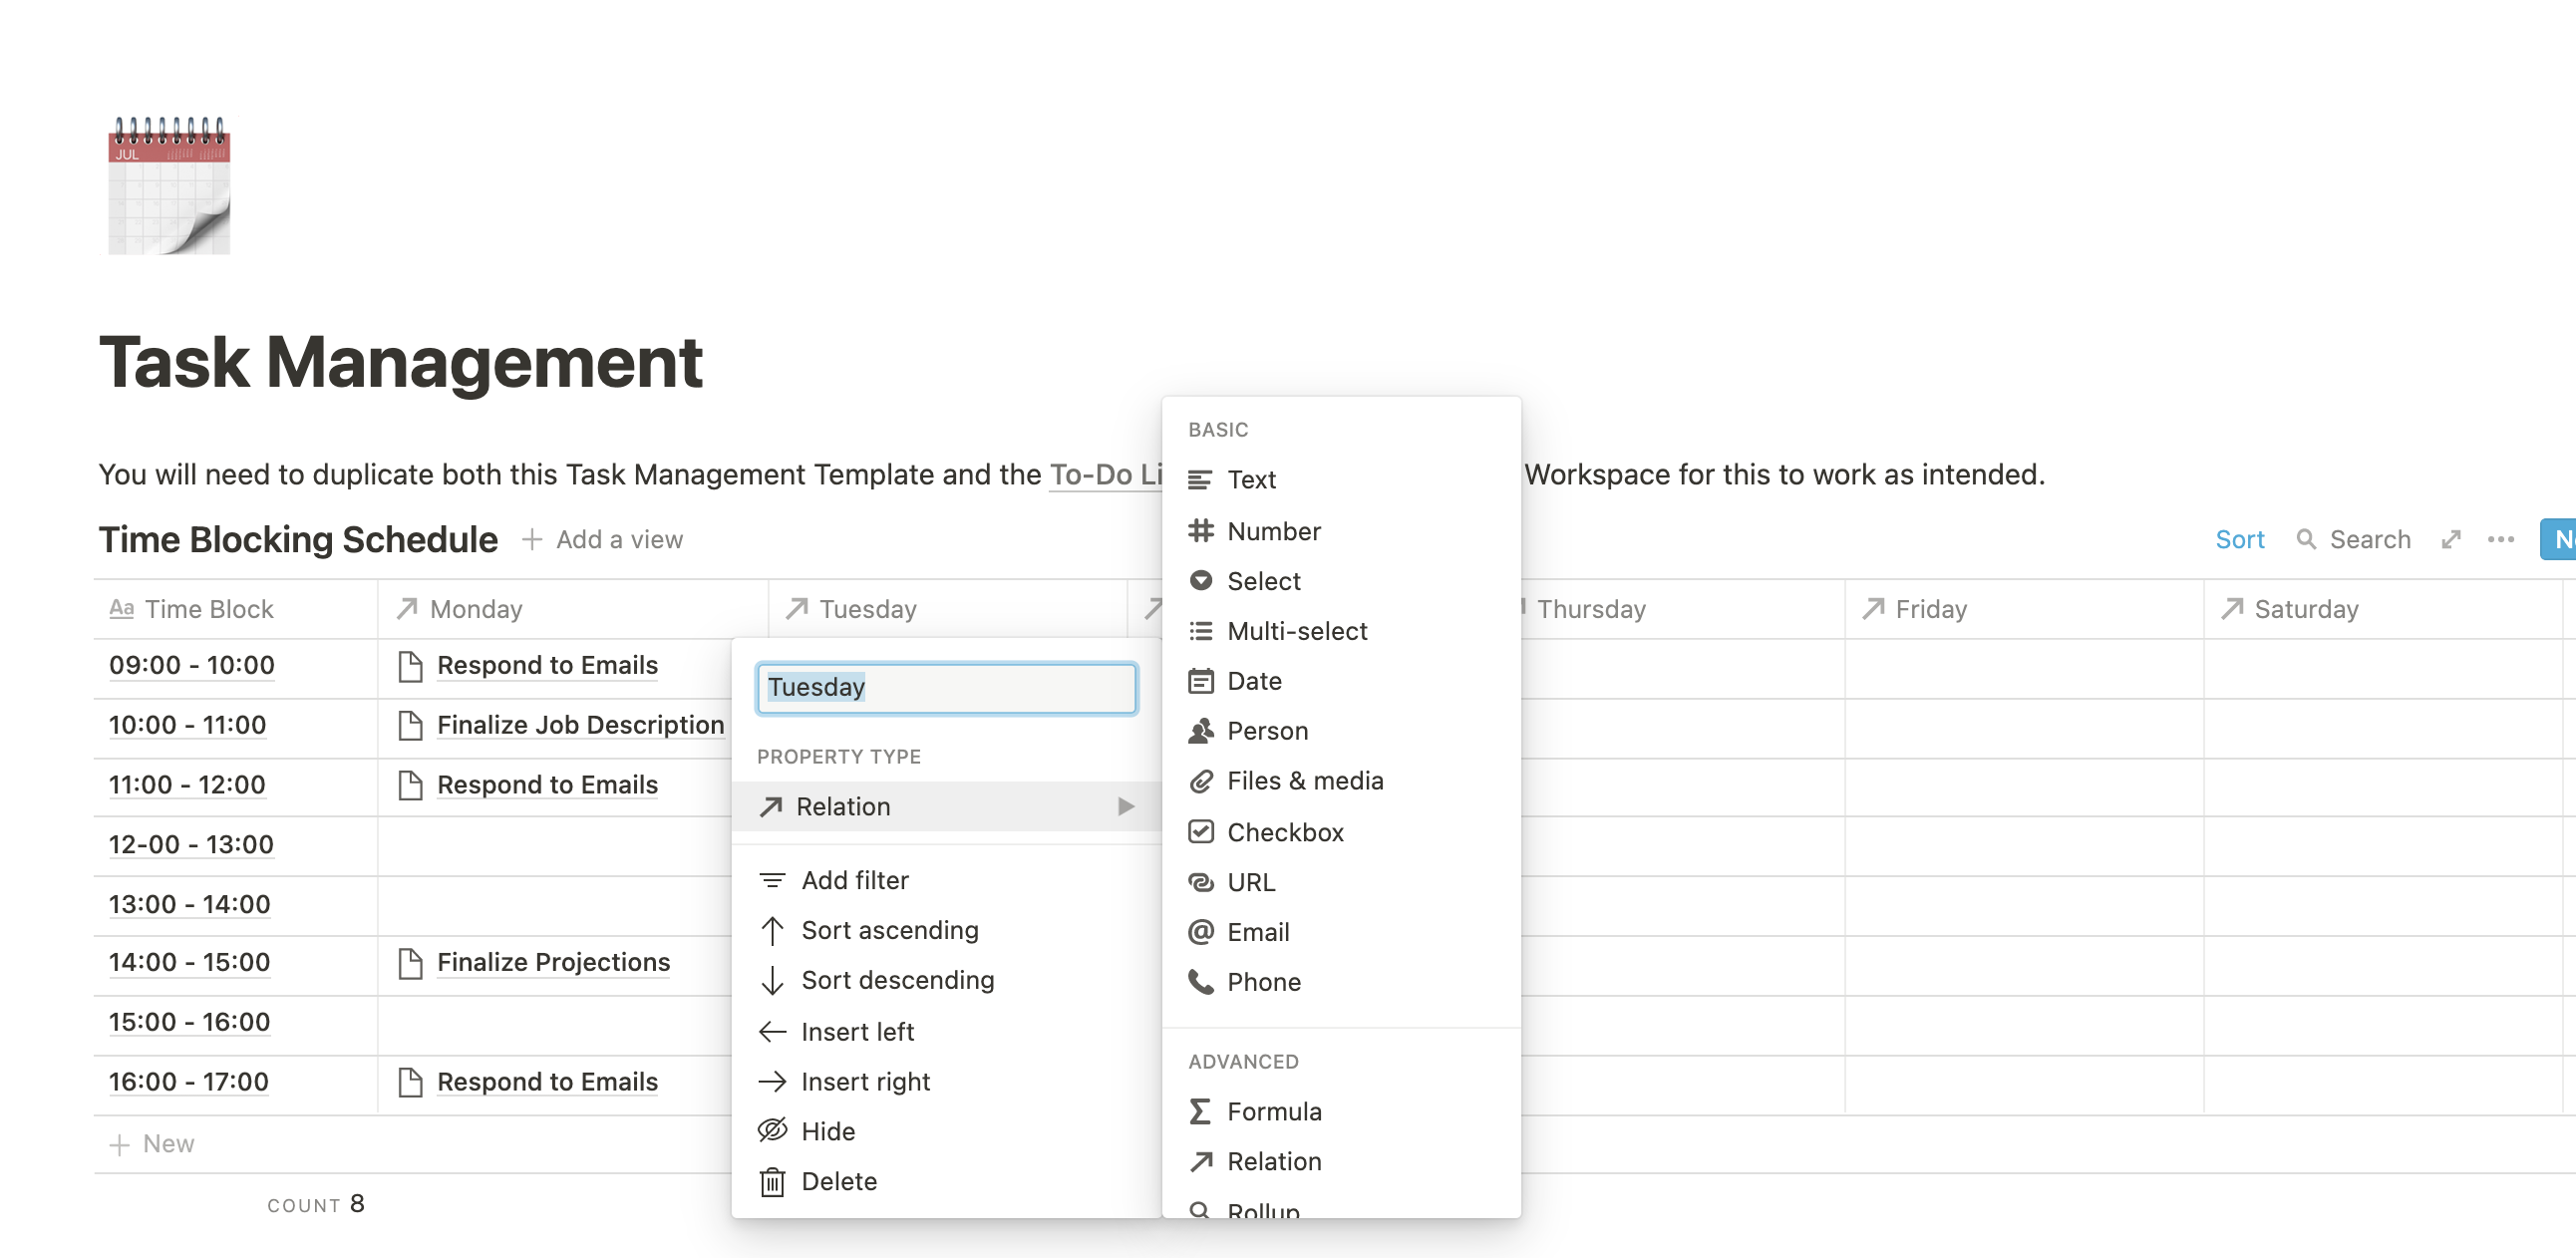
Now, click the Create Relation button, then follow this same process for the rest of the columns you created (Tuesday through Sunday). Once you’ve finished doing that, you’ll be able to click in a time block in each column, and search for and select the task you want to work on in that window right from your to-do list.
But how do you know which items you’ve scheduled to work on from your to-do list? Well, Notion will automatically include a field on your to-do list for each relation you set up to indicate that a relationship has been formed with another database. This is fantastic, but you’ll want to do a little bit of cleanup.
By default, it will show all relationships, but with some slight customization we can set it to show a prompt when something has been scheduled for work. Start by opening up your to-do list, then right-click on one of the newly-created relation fields. Scroll down to Hide Property and select Hide when Empty.
While connected, you still need to head to different Pages in Notion to view your to-do list and time blocking schedule. That’s why we recommend embedding your to-do list on your time-blocker so you can see what has been scheduled, what hasn’t, and what you have coming down the pike. Once again, this can be done in a couple of clicks.
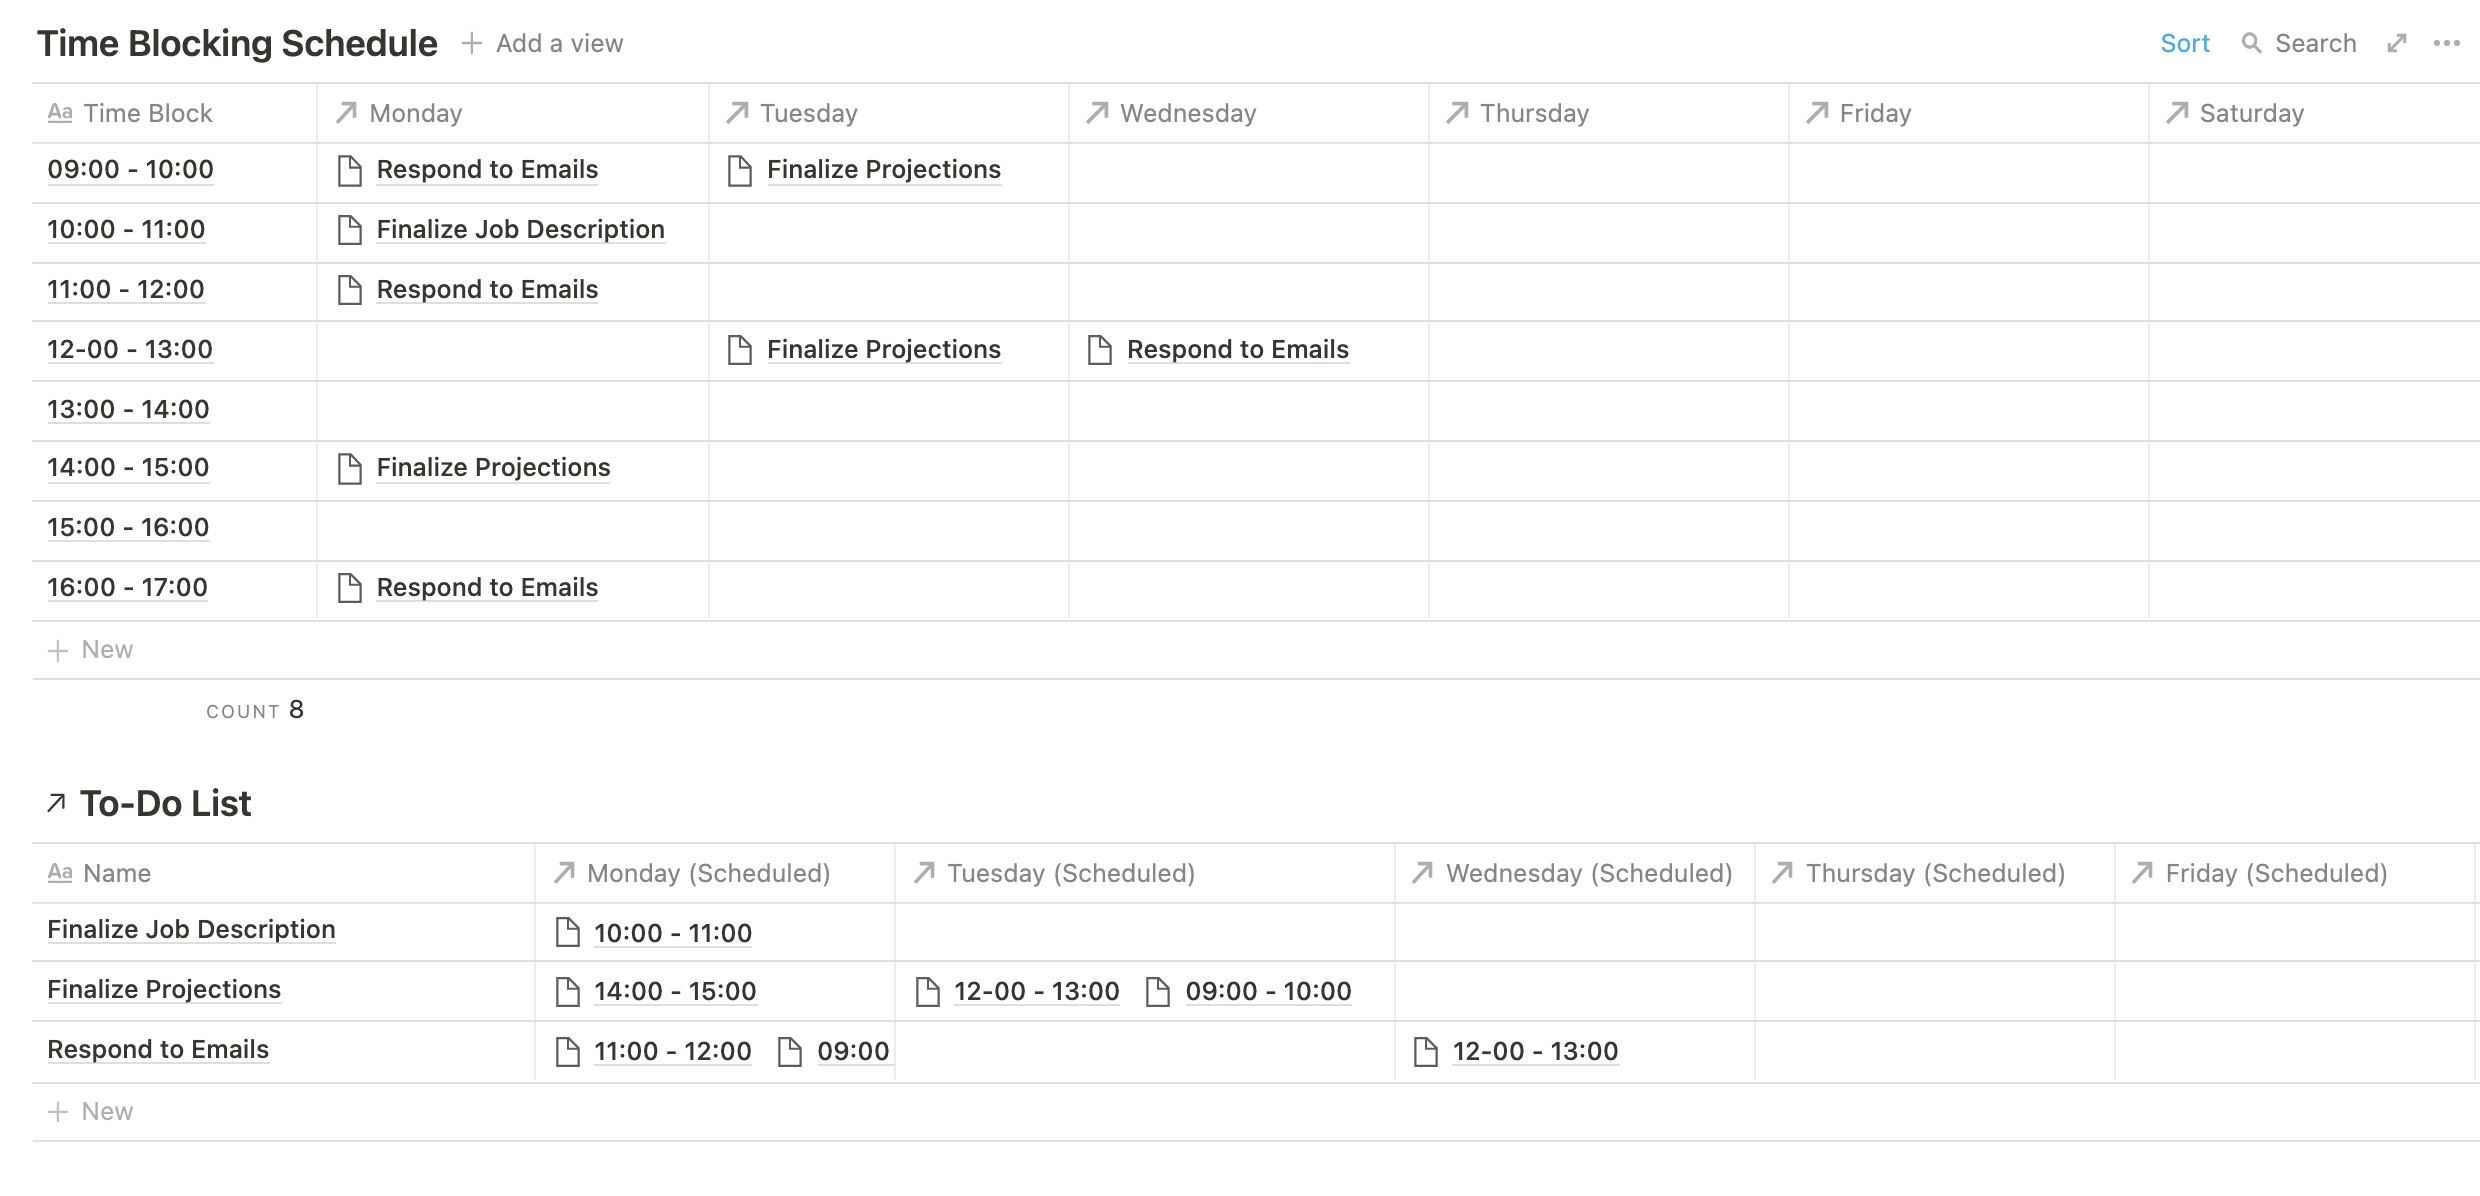
Head back to your time blocking template, then hover beneath the table. You’ll see two icons appear to the left; click the + symbol, then select Create Linked Database, and search for and select your to-do list. This will add it beneath your schedule — when you make a change there, it’ll carry over to your to-do list page, and vice versa.
Once added, you’ll be able to see which days you have time scheduled to work on each task without having to jump to your to-do list. For us, this means we use our standalone to-do list for adding tasks while we’re out in the field, and our time blocking schedule for booking them in when we’re mapping out our week.
One thing worth noting now is that these instructions will walk you through creating a standard, relationship-based time blocking template, but you shouldn’t stop here. Our workflow isn’t the same as yours, and neither is our Workspace setup, so feel confident tweaking things as you see fit and improving it for you.
Notion Time Blocking Template
Now we’ve shown you how to create this Notion time blocking template and walked you through how it works, it’s only write we offer it up to download for those who’d rather add it to their Notion Workspace and get to work right away. You will need to hand over $5 for the luxury though.